
Gates, elevator doors, train’s doors have a sensor that prevents closing the gate/door if someone is blocking the way. This kind of sensors are often called infrared barriers.
There are different types of infrared barriers: they can be found as ready built sensors sold in couples: where one part is the transmitter and one is the receiver to be placed on the opposite side of the gate.
Or they can be made also as a single sensor that hosts both an infrared led and an infrared receiver mounted side by side. In this configuration, used also to determine the distance of the obstacle, the infrared light emitted from the led is reflected on the obstacle and the time spent to receive back the reflected light determines how near is an object. By placing a reflector at a fixed distance (on the opposite side of the gate) you can create a barrier because the diatance given by the reflector is fixed and changes whenever something is between the reflector and the sensor.
A similar behaviour can be made using TOF sensors, where the acronym stands for Time Of Flight. They are really small infrared sensors that measure precisely the time passed to receive the reflected light and can give you accurate measures of the distance. A famous sensor of this kind is the VL531LX, and using a reflector as before can turn it into a IR barrier.
In this article we examine how an infrared barrier can be made using two cheap components: a VS1838B infrared receiver (always available in any Arduino kit and normally used with remote controls) and a standard IR led. These components are the same that you can find in your TV and remote control.
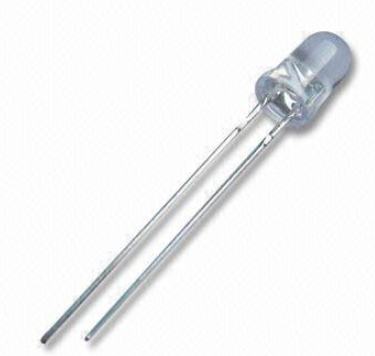
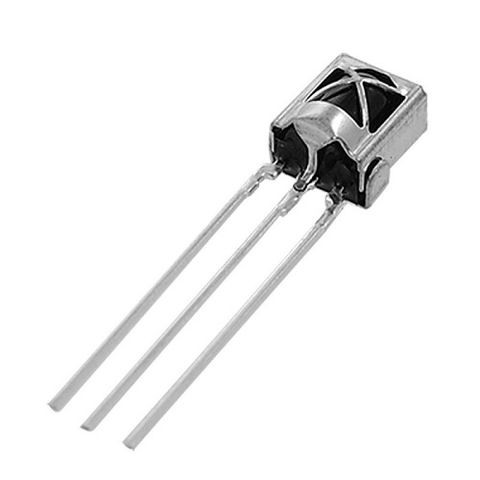
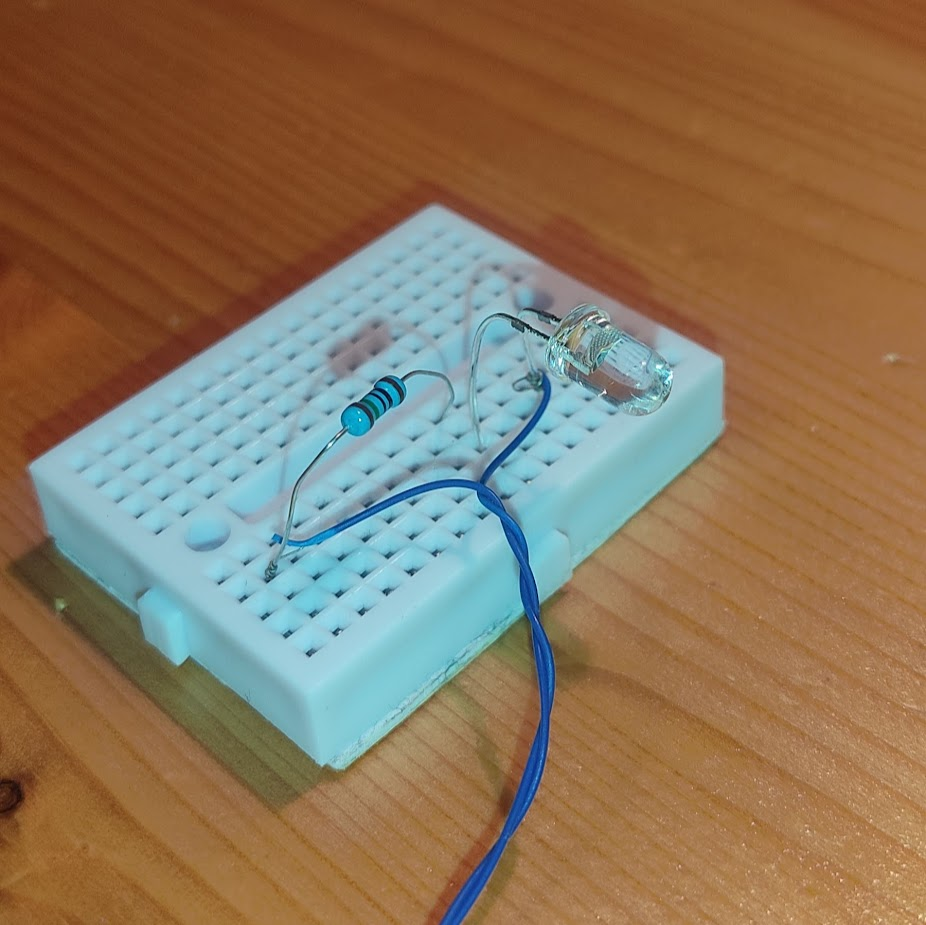
An IR led and VS1838B sensor look like these:
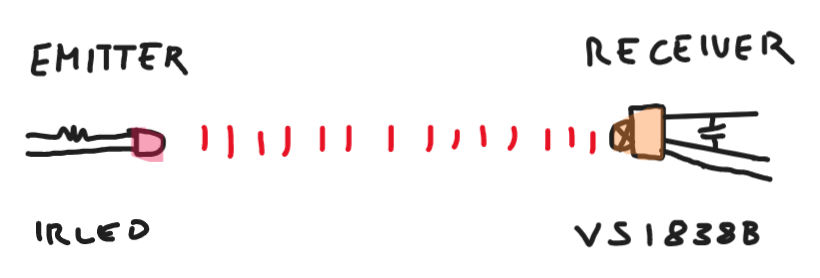
To make a barrier, the two parts must be placed on opposite sides because both the led and the receiver have wide angles that interfere each other, moreover the standard IR leds do not emit enough light to hit an obstacle and reflect energy back to the receiver.
This led at a glance is the same of a standard 5mm led, but emits light only in the infrared spectrum, around 940nm, which is a light not visible for humans (but you can see it using a smartphone camera, pointing it in front of the led).
The VS letters in the sensor name stands for Vishay, which is the American company that manufactures the sensor.
To make the barrier work you have to place the two parts on opposite sides of the gate, and this configuration sometimes could be a problem, because of the long wires between them.
Another thing to solve using these parts is that the receiver detects only a modulated signal and not simply IR light. That is to say that it’s not enough to turn on the IR led and point it to the receiver to read a ON/OFF from the sensor.
The VS1838B sensor detects changes in a signal modulated with a square wave at 38Khz. This is a nice trick to remove noise that can be caused by lights, hot sources, sun lights or just by reflections from near objects or interference from other devices using infrared signals.
Fortunately in Arduino there is a command called “tone” which is used to modulate a square wave with the PWM pins of our microcontroller. The tone command is normally used to play with buzzers and speakers to make sound, but if connected to an IR led can be used to generate a signal that changes accordingly to be detected by the VS1383B.
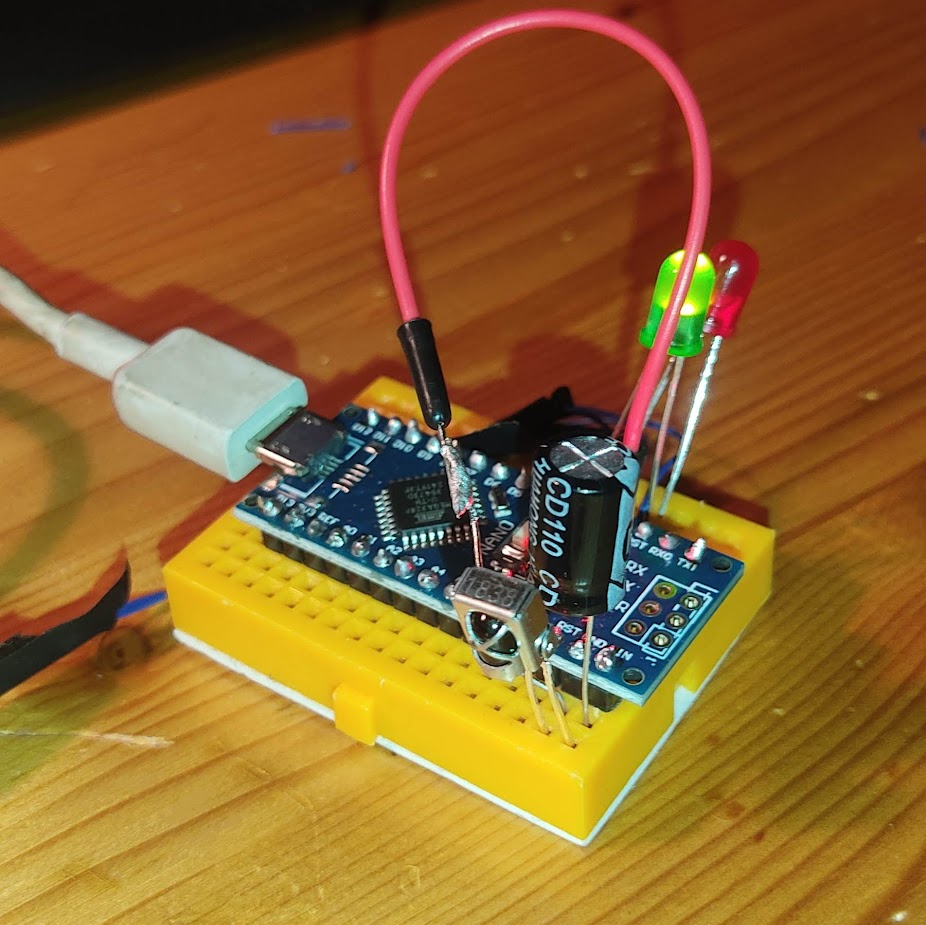
So we have to arrange all the parts, here I’m using an Arduino Nano but every microcontroller that generates PWM signals can be used, in this way:
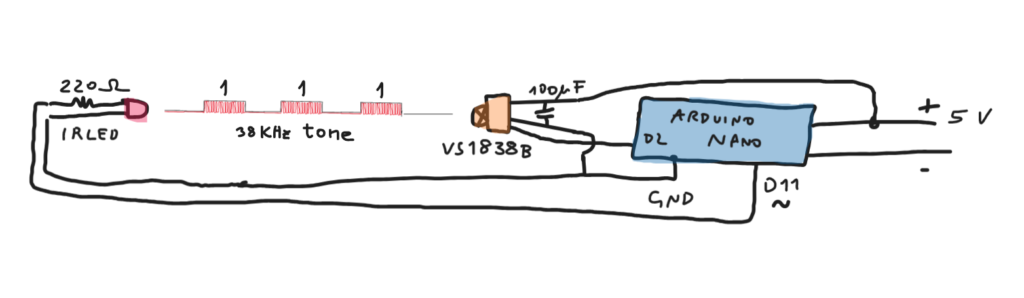
As you can see there are a 220 ohm resistor attached to the led, and a 100 uF attached to the sensor. The resistor limit the max current through the led and the capacitor avoid noise, in my setup without this the sensor was useless.
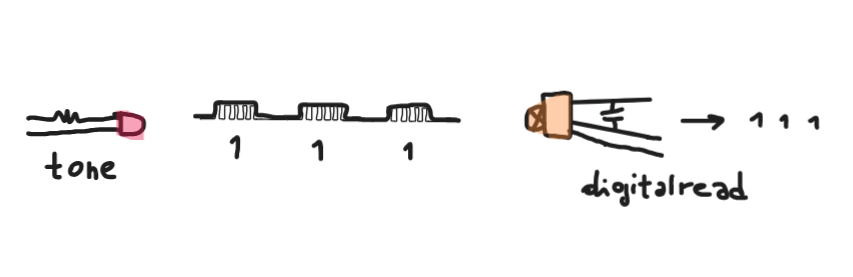
With pin D11 we generate a square wave signal with tone at 38KHz and turn it ON/OFF:

As we can find from the datasheet (I’ve found it only in Chinese) the 1 duration is 600us and the 0 length is 900us.
Unfortunately the VS1383b is a bit picky and if you just keep turning on and off the modulation it find the signal boring and stop detecting it after a few impulses. So we need to send a small burst of bit sequences like 0-1-0-1-0… then make a pause and start sanding another burst again.
The pause is crucial to keep the sensor working, the datasheet says that pause must be T >= 5ms but for some reason in my setup it must be T >=20ms.
So we must send a defined number of 1 bits, and then pause. When we make the pause we can compare the number of bits sent and the bits received. If it’s the same, the barrier is free.
But if some of the bits are lost the barrier could be partially occupied by an obstacle. If all the bits are lost the barrier for sure has an obstacle between led an VS1838B.
We can achieve this result both using timers and interrupts:
Using timers
We can use timers to handle timing of the activation/deactivation of tune function and to wait the correct amount of microseconds to check for the output of the sensor.
//
// read barrier, infrared with timers and tone
//

int IR_LED_PIN = 11;
int IR_RECEIVER_PIN = 2;

void setup () {
  pinMode(IR_LED_PIN, OUTPUT);
  pinMode(IR_RECEIVER_PIN, INPUT);
  Serial.begin(115200);
}


int readBarrier(unsigned int len) {
  int s1_0 = 0;
  int count = 0;
  unsigned long m1 = micros() + len * ( 600+900);
  unsigned long m2 = 0; // timer switch ON/OFF ir led
  int k = 0;
  // every m1 timer we turn on/off the signal Len times and check the receiver
  while( micros() < m1) {
    // IR transmitter
    if( micros() > m2) {
      m2 = micros() + (k%2==0 ? 600 : 900); // 600us for 1 and 900us for 0
      if(k%2==0) {
        tone(IR_LED_PIN, 38000);
      } else {
        noTone(IR_LED_PIN);
      }
      // Check received bit and count it
      while (micros()<m2) {
        int s1 = digitalRead(IR_RECEIVER_PIN);
        if (s1 == 0 && s1_0==1) {  // falling
          count++;
        }
        s1_0=s1;
      }
      k++;
    }
  }
  delay( 20  );
  return count;
}

void loop() {
  Serial.println( readBarrier(10) );
}
Using interruput:
…and we can also use Interrupts. Interrupts allow us to execute a function when values change on a pin and we look exactly for a falling signal from 1 to 0:
//
// read barrier, infrared with interrupt and tone
//
// originally here: https://forum.arduino.cc/t/solved-problem-with-ir-receiver-vs1838b/628739

#define IR_LED_PIN 11
#define IR_RECEIVER_PIN 2

volatile int count;

void setup() {
  pinMode (IR_LED_PIN, OUTPUT);
  pinMode (IR_RECEIVER_PIN, INPUT);
  attachInterrupt(digitalPinToInterrupt(IR_RECEIVER_PIN), falling, FALLING );
  Serial.begin (115200);
  count = 0;
}
// this function is called when the sensor output a falling signal
void falling() {
  count++; // count it!
}

int readBarrier(unsigned int len) {
  for (int i = 0; i < len; i++) {
    tone(IR_LED_PIN, 38000);
    delayMicroseconds(600);
    noTone(IR_LED_PIN);
    delayMicroseconds(900);
  }
  int count2 = count;
  count = 0;    // reset counter
  delay(20);    // minimum pause
  return count2;
}

void loop() {
  Serial.println( readBarrier(10) );

}
Both the solutions work and do exactly the same thing.
I’ve tested the barrier with a distance grater than 3 m between led and receiver!

Comments on “How to build an infrared barrier with IR led and VS1838B receiver and Arduino”